Contents
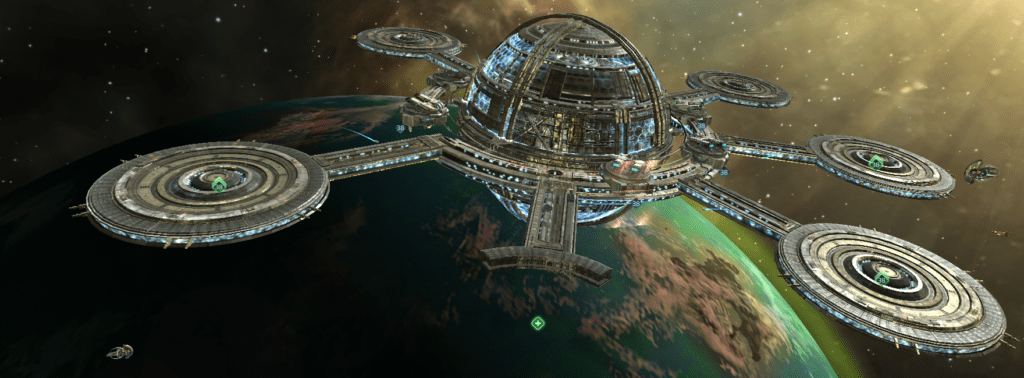
Base Defense
The best defense in this game is a shield. If you aren’t shielding, your base is 100% vulnerable to attack. It doesn’t matter how well your ships are prepared, how big your base is, everyone is able to be cracked with a bit of patience. That being said, if you are looking for active defense, or defending your base as you raid so others can’t hit it, then this page will have some tips for you.
Order of Ship Attack
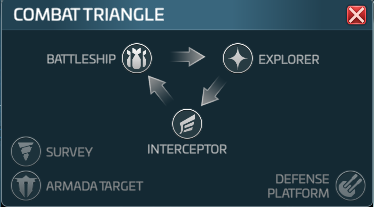
Depending on what ship attacks, different ships will be attacked first that are docked at your base. Ships will ALWAYS attack the ship that is opposite them on the combat triangle, so the easiest ship to kill. This means explorers will hit interceptors, interceptors hit battleships, and battleships hit explorers first. They also hit the weakest of this type. After that, they’ll attack the same type as they are, then the opposite of themselves on the triangle. After all this they’ll attack miners from weakest to strongest.
Active Base Defense
Active base defense is when you are there and watching and just need to keep people from raiding you while you are fighting other ships, or raiding another base. To make this work, you want to have ships and crews at home that can prevent people from breaking through your defenses. Also, you need to use latinum to repair, because you needs these ships to come back ASAP. So let’s talk about crews and ships. If you don’t care about why this works and just want the crews/ships, click here.
This is a modification of the BOLD defense released by Server 14’s PatrickLiggs and 867.
Ship Crews
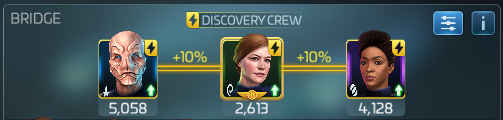
Ship 1 – Realta
Picard(Captain)/Bev/Harrison
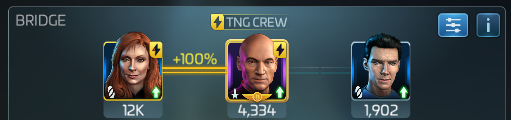
At tier one, Harrison removes 60% of the opponents shield absorption for the first round of combat. Pike or Picard will boost this by 120% if they have an officer on the side with synergy. This will then push it past 100%, which means shields won’t count the first round and all that damage goes straight to hull. The reasoning of having him on the first ship to die is that his ability is only important for round one.
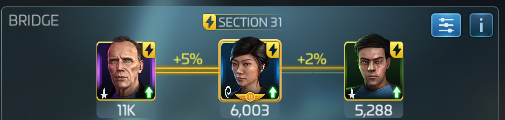
Ship 2 – Turas Tier 1
Kras(Captain)/Georgiou/Nero
Kras lowers captain abilities by 20%. You want him in the base defense because he will eliminate Rom’s captain ability of making you wait until round two before you can hit an attacking ship. This means that Harrison will give you that huge damage boost round one.
If someone is being clever, they could technically raid you with Rom(captain)/Next Gen Crusher/Cadet McCoy to counter Kras. If they do, shield a second, and replace Nero with one side officer for synergy.
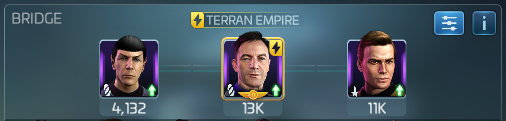
Ship 3 – Turas Tier 2
Tilly(Captain)/Burnham/Saru
Again, this is about removing the shield early. Tilly will remove 30% of the opponents shield with 2 officers boosting it. Burnham will remove more. Saru lowers weapon damage slighty.
It was tested with using this crew on Baby Jelly instead of Yuki, unfortunately the baby Jelly doesn’t seem to work with Tilly, she still does 30% shield reduction.
Ship 4 – Jellyfish Max Tier
Yuki(c)/Zhou/Marcus
Not full synergy, but the only other synergy officer for this crew is Harrison, which you’ve used already. Yuki removes 17% of shields from opponents ships every round.
Ship 5 – Fortunate Tier 2
Lorca(c)/TOS Spock/Kirk or TOS Kirk
Skip with 5 ship defense. Lorca will reduce enemy ship damage by 100% of base, as well as another chance at hull breach round one. TOS Spock will reduce opponent’s critical damage, as long as you have moral proc from Kirk.
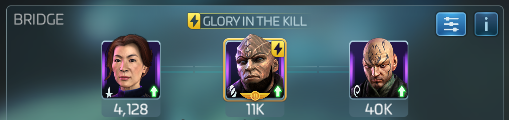
Ship 6 – Fortunate Tier 3
Pike(c)/HG Worf/Gorkon

If you have 6 docks and are raiding, use 5 dock defense and put Amalgam here. If you have 5 docks and are raiding, skip this ship entirely and put Amalgam here.
This ship is very easy, it’s the hull breach ship. Pike boosts Gorkon and HG Worf by 40%, so even at tier one Gorkon will have a 98% chance of applying hull breach on critical hits, and Worf will increase the ship’s chance to crit by 63% at tier one. Since you have a base 12% crit chance, that’s a 73.5% chance to apply hull breach on round one from this combination. If they’re both tier 2 that’s an 82% chance, Gorkon being 100% then. Tier 3 Worf is 96%, after that it’s 100%.
Ships
Okay, so what ships do you keep home? You can go for your most powerful ships and hit any attacker as hard as possible every time. The problem with this is you can’t control the order of ships being attacked. Or you can go the economic and control route, which is what we’re going to talk about here.
Six Docks
| Ship Number | Type | Tier | Crew |
|---|---|---|---|
| 1 | Realta | Unimportant | Picard(Captain)/Bev/Harrison |
| 2 | Turas | 1 | Tilly(Captain) With Fully Synergy |
| 3 | Turas | 2 | Kras(Captain)/Nero/Georgiou |
| 4 | Jellyfish (Baby) | Max (Important) | Yuki(c)/Zhou/Marcus |
| 5 | Fortunate | 1 | Lorca(c)/TOS Spock/Kirk or TOS Kirk |
| 6 | Fortunate | 2 | Pike(c)/HG Worf/Gorkon |
Five Docks
| Ship Number | Type | Tier | Crew |
|---|---|---|---|
| 1 | Realta | Unimportant | Picard(Captain)/Bev/Harrison |
| 2 | Turas | 1 | Tilly(Captain) With Fully Synergy |
| 3 | Turas | 2 | Kras(Captain)/Nero/Georgiou |
| 4 | Jellyfish (Baby) | Max (Important) | Yuki(c)/Zhou/Marcus |
| 5 | Fortunate | 1 | Pike(c)/HG Worf/Gorkon |
Four Docks
| Ship Number | Type | Tier | Crew |
|---|---|---|---|
| 1 | Realta | Unimportant | Picard(Captain)/Bev/Harrison |
| 2 | Turas | 1 | Tilly(Captain) With Fully Synergy |
| 4 | Jellyfish (Baby) | Max (Important) | Yuki(c)/Zhou/Marcus |
| 3 | Fortunate | 1 | Kras(c)/HG Worf/Gorkon |
The reason we’ve chosen these ships is we can control the order the are destroyed in. Our goal is to have the ships with the officers that are most important survive the longest, with the earlier ships not mattering at all as they only need to be alive round one.
The Realta, Turas and baby Jellyfish have abilities we only need for round one. Harrison and Tilly have abilities that only work at the start of combat, and Kras has already done his job by eliminating Rom in round 1.
Since they are all explorers, their order will be determined by their power. In this case, we actually don’t really care which one survives longest but it’s still good to know we’ve determined the order.
After all the battleships are dead, then it’s power order of miners. So the tier 1 Fortunate dies first, then tier 2 then tier 3. This means we have the best chance for the crews at the end to last for more rounds of combat.
So we know the order, and we know one other thing. All these things are dirt cheap to repair. So you won’t be wasting repair speedups or resources repairing, so you can get them back up again nice and quick. It’s even quicker if you’re willing to spend the latinum to instant repair them, each sweep of the base is then just a few lat.
Don’t forget to repair the guns, as they are the vast majority of damage.
So with this crew, you’re going to cost anyone hititng you a ton of money in repairs, and you’re going to be paying little to nothing. During incursions, this is a great way to get some defense damage in as well for the events.
Overview
So what these crews do:
1. 100% of damage to hull round one
2. Remove 58.9% of attacker’s shield round one (before Burnham, who will depend on your stats), 87.7% of shields round two (if Yuki survives and before Burnham).
3. Apply Hull Breach (50% more crit damage) and Burning (1% of hull destroyed each round).
4. Stop Rom’s captain ability.
5. Lower opponent’s crit damage by 50% or more with TOS Spock
6. Lower Base Damage with Saru (10% and Lorca
Other possible useful officers: Badgey (lower mitigation), Vemet (shield strip)